Why Apple Cider Vinegar Should Be Your New Skin Care Product

If you have tried every skin products and you have not gotten results, apple cider vinegar may be the answer to your prayers.
Apple cider vinegar is very effective when taken internally as or when applied to the skin externally.  In fact, many people use apple cider vinegar as part of their daily beauty regime. It is a cost effective, 100% natural and organic way to keep your skin feeling fresh and young.
Apple cider vinegar contains vitamins A, B1, B2, B6, C and E.

Why You Should Use Apple Cider Vinegar For Your Skin
Apple Cider Vinegar is organic meaning it is natural and will not damage your skin if correctly used. If you have used some skin care products and have not gotten results from them, why not try Apple cider vinegar.
Apple cider vinegar has been used because it clears skin blemishes and makes the skin radiant and young.
Reduces age spots
When you apply ACV daily on your face will notice a substantial difference in age spots. Apple cider vinegar contains alpha-hydroxy acids that remove dead skin and reveal healthy and vibrant new skin.
Dab a little on a cotton ball and apply directly to age spots. Wait about thirty minutes and rinse your face with cool water and pat dry.
Do this twice daily for six weeks, and you will see a significant difference.
 Clears acne, pimples and blemishes
You do not need to buy commercial acne cream when you can use apple cider vinegar. When Apple cider vinegar is made, malic acid forms.
This makes apple cider vinegar a potent antibacterial, antifungal and antiviral substance that can keep bacteria at bay and pimples from forming.
Balances your skin
While removing excess oil from your skin, apple cider vinegar will also help to balance pH and keeps your skin from becoming too oily or too dry by balancing the production of sebum.
Rinse your face daily with apple cider vinegar to balance your skin.
Fights wrinkles
A diluted apple cider and vinegar face wash can help minimise the appearance of fine lines and wrinkles.
Alternatively, you can soak a cotton pad or cotton cloth in diluted apple cider vinegar and dab it on your skin. Rinse with warm water and pat dry.
Detoxifies your face
Daily use of apple cider vinegar will help draw toxins out of your skin leaving a youthful and clean glow.
Make sure you use an organic apple cider vinegar when using it for your skin.
DIY Beauty: Homemade Perfume

Beautiful fragrance scents are mostly expensive, and they sometimes contain chemicals that could cause allergic reactions, headaches and so on. If you would prefer to use a perfume made of natural ingredients, this is for you.
This Homemade perfume is made from essential oils and coconut oil.

Ingredients
Coconut oil
Essential oils
Container
Before we move on, we need first to understand the order to make perfume from essential oils.
Perfume is made up of a blend of essential oils; the top note, the middle note and the base note. When making your perfume, you start with the base notes, followed by the middles notes and then finally the top notes.
The top note is the first thing you smell in the perfume, but it dissipates quickly. Example of top note essential oils includes: Basil, Bergamot, Eucalyptus, Grapefruit, Lemon, Lime, Orange, Peppermint, Rosewood, Tangerine
The middle note lingers, it is called the heart of the fragrance. e.g. Chamomile, Cypress, Geranium, Ginger, Lavender, Lemongrass, Rose
The base notes evolve over time; they are often earthy scents. e.g. Frankincense, Myrrh, Patchouli, Sandalwood, Vanilla
A perfect composition of a perfume will be 10-30% top note, 30-60% middle notes, 15-30% base notes.
Procedure

For a small quantity, 20 drops essential oil of your choice is ok: 5 drops top notes e.g. Lime (25%), 9 drops middle notes e.g. Lavender (45%), drops base notes e.g. Vanilla (30%)
Drop your essential oils in the bottle
Add coconut oil
Shake well

Done!
Extra Tips

Use dark coloured will help preserve your fragrances by keeping light out
Store your perfume out of direct sunlight
Shake your perfume well to allow the scents before application
You can use a roller bottle or a spray bottle to store your perfume

DIY treat recipe: Homemade Ice Pops

We probably are familiar with popsicles or at least some form of lollipops and how it is a hit with children of all ages. Here is an easy recipe for Ice Pops with easy to get ingredients. For this recipe, we will be using soda since you can easily get it
Homemade Ice Pops
Ingredients
Soda e.g. Coca – Cola or 7UP
Moulds
Food colouring (optional)
Pop sticks

Image via prariemoon.biz
If you do not have a Popsicle mould, you can use your freezer’s ice block mould or disposable paper cups or any other container depending on the size you want

Image via tested.com
Procedure

Pour the soda into the .

If you are using a colourless soda like 7up; you might want to use a little colouring, just to give it a different look. After pouring your drink into the mould, add a few drops of colouring and mix with a spoon

Cover your juice with foil, dip in your sticks and place in the freezer
Leave in the for about 4 hours or overnight and your ice pop is ready

It is so easy!
Tips

You can make ice pops with just about anything; you could use juice or any soft drink mixed with flavouring or sweetener, just don’t use granulated sugar as it mix completely with liquid ingredients
Don’t add the pop sticks from the onset; place the in the freezer for about 30 minutes for the juice to slightly solidify, and then wedge the .
Don’t fill your to the brim to allow space for liquid expansion

Image via daisysworld.net
Try this out and let me know how it goes.

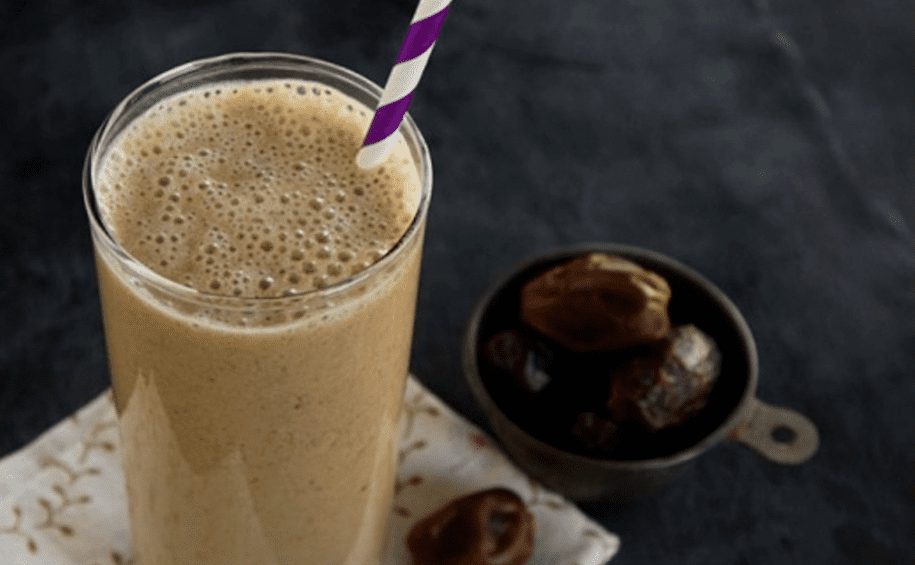
Drink Recipe: Moroccan Almond Date Milkshake

Aside from her beautiful sights, Morocco is home to scores of fruits and exotic cuisines. A trip to Morocco is an assured treat to a variety of the freshest of Sharbat and shakes. Sharbats are natural juices of the various fresh fruits Morocco boasts of.
Avocados, bananas, dates, grapes, oranges, kiwis, pomegranates, plums, apricots, lemons, carrots, peaches, watermelon and peaches (the list sure goes on) are available at different times of the year in Morocco. Almonds and walnuts are not left out too; they come in handy as essential components for the fruit juices and shakes Morocco is known for.
These drinks and milkshakes which are served as a healthy snack, dessert or part of a meal are also freshly made and sold in the souks (open-air markets) and patisseries (cookie shops) all over Morocco. At weddings and special celebrations, in particular, it’s a Moroccan culture to serve guests sweet almond date milk as a wish for a sweet life.
Rich in iron and an excellent source of dietary potassium, Dates are real healthy fruits. They’re also considered sacred in Islamic cultures. And Almonds? Rich in carbohydrates, Vitamin E, protein, dietary fibre and monounsaturated fat, Almonds also improves complexion and possibly lower cancerous activities in the body. Consumption of almonds helps in elevating blood levels of high-density lipoproteins (HDL, which is the good cholesterol) and lowering of low-density lipoproteins (LDL, the bad cholesterol).
Are you looking for a natural go-to drink to keep you refreshed this season? Or something out of the ordinary to thrill your guests as the holidays gets near? You should give this delicious, simple Moroccan milkshake a try – a healthy combo of dates and almond!
Aside from the refreshing taste, there is a broad range of essential nutrients this milkshake has to offer the body. Let’s make some!

Moroccan Milkshake
You’ll need:

½ cup of Almonds
10 – 15 Dates
250 ml Three Crowns milk (preferably powder – dissolve about 4-5 tablespoons in a 250ml cup of water)
A handful ice cubes
One pinch ground cinnamon (optional)

Serving: 2 glasses
Preparation
Soak almonds and dates in warm water for about 30 minutes each in separate bowls. Remove and deseed dates.
Pour half a cup of water into a blender or food processor, add soaked almonds and dates then process on high speed until finely ground.
Add the milk and blend on high speed for a good mix. If desired, add ice cubes and process until the ice is crushed and the milkshake is well chilled and frothy.
Pour into glasses and serve immediately. Love to spice it up a bit? Sprinkle on a dash of cinnamon!
 

Drink Your Way To A Flat Belly

The rains are gradually fading away. The dry season is setting in, and of course, perspiration is increasing. One definite way to combat it? Stay hydrated!
Being well-hydrated is not only for countering the humidity and warm temperatures that accompany the incoming season, but also very essential for good health. Consuming water is necessary to keep the body’s systems functioning properly.
Staying hydrated is also significant to weight loss. Water retention is one of the leading causes of bloated tummies, but with plenty of water intake, this is curbed, and your body maintains proper fluid balance. Drinking lots of water also increases the feeling of fullness, so you eat less.
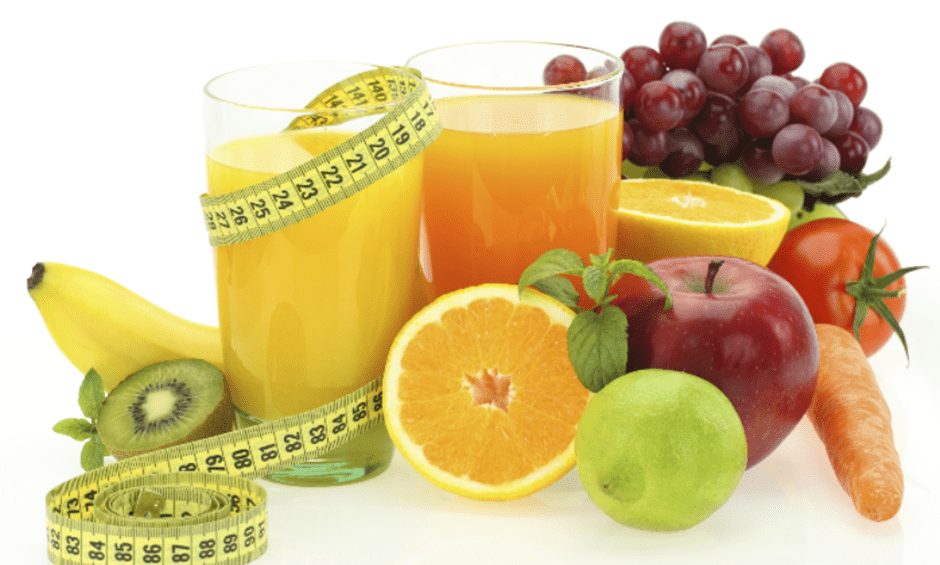
Rather than drink plain water (which can be very boring), smoothies and flavoured water are a guilt-free way to hydrate – as long as you don’t load them up with artificial ingredients. Having a smoothie for breakfast helps you start your day hydrated. With a glass of smoothie, you won’t need to sip on water. Plus, you’re delivering loads of nutrition to your body from the fresh fruits and other wholesome foods. If that’s not enough, many of these readily available foods have shown to help diminish belly fat. So combining these super ingredients together is more like killing many birds with just a stone, right?

Lemon and lime are common fat burners but let’s have a look at more fruits and other foods you can indulge in for a significant reduction in your tummy fats.
Exceptionally high in phytonutrients – lycopene (effective fat burning and cancer-fighting antioxidant) and arginine (an amino acid that works in decreasing body fat and increasing lean muscle mass), Watermelon ranks high on the list of fat burners. Made up of about 90% water, watermelon works efficiently in keeping you hydrated, checking fluid retention and bloating.
Another highly recommended belly fat blaster is Peppermint. Do you know that peppermint helps your stomach process fat, while also enhancing quick digestion of any fatty food you eat?
Loaded with bromelain, an enzyme that helps break down protein, ease digestion, and banish bloat, you should make the most of the Pineapple which is another superfruit.  
Polyphenols called catechins abound in Green Tea. This nutrient increases your body’s ability to burn fat (especially abdominal fats).
Tomatoes are not called nature’s secret weapon against fat just for fun. Why? They’re brimming with fatty acid substances that lower lipids in the blood and helps control belly fat. And of course, they contain lycopene too.
Nuts come highly recommended on the list of fat burning foods. Walnuts, almonds, cashew, peanuts and even coconuts contain fibre, healthy polyunsaturated and monounsaturated fats which keep you feeling satisfied and aid in melting belly fat.
Anthocyanins are super antioxidant flavonoids found in high quantity in berries, cherries, grapes and apples. These nutrients have a high potency in inhibiting fat cells while also speeding up your body’s metabolism, thus enhancing fat burning. Mangoes, pears and bananas also possess anthocyanins.
Is stomach fat burning fruits? Cucumber, oranges and kiwi. Oats, spinach, greek yoghurt, flax seeds, ginger, cinnamon are other foods that work effectively in burning abdominal fats. Include them also in your refreshing smoothies. There are so many fruit choices to combine; drink up and in no time you’ll have killer abs to flaunt!

Firm Your Sagging Breasts Naturally

When someone has sagging breasts, it can make them look older. Every woman wants her breasts to look firm, perky and beautiful.
It can be caused as a result of improper care, negligence, childbirth, breastfeeding, nutritional deficiencies, existing medical ailments like breast cancer and tuberculosis, etc., wrong sized bras, menopause and of course the earth’s gravitational pull.
However, there are things you can do to firm up your breasts or prevent it from sagging.

How to firm sagging breasts naturally.
Wear supportive sports bras while exercising.
The breasts bounce and stretch with each jump or step. If you have large breasts, you should look for underwire sports bras with thick straps.
Sport’s Bra should fit more snugly than lingerie. It should wrap around your rib cage.
Lie on your back when sleeping.
 If you prefer to sleep on one side while you sleep, you may find that the top breast sags and stretches more.
By sleeping on your back, you can keep both breasts firmer longer.
Avoid weight fluctuations.
Yo-yo dieting can cause stretch marks and inelastic skin.
Whenever you gain weight, your breasts may appear to sag more when you lose it, because the skin has to stretch around the extra fat tissue.
Replace your bras when the supportive bands stretch. If the last clasps on your bra no longer provide a tight, supportive fit, then you need to replace them.
Your breast size can change with hormones, weight fluctuations and pregnancy, so make sure you get sized for a new bra if your current bra is uncomfortable or too loose.
Apply anti-aging creams on your neck and upper breast area. Choose formulas that improve collagen in the skin. They can make your cleavage look more youthful.
Ice or cold water
Applying cold water on your chest can help firm your breast. Cold water or even ice can help your breasts avoid sagging.
After you have finished showering, rinse your breast with cold water (if using hot water). You can even rub some ice on them.
Breast firming mask recipe
These homemade masks would help you firm your sagging breasts and make it look youthful.
Apple Mask- firming recipe
This is a traditional recipe that needs only a few ingredients and just a little time.
You will need:
2 Apples – or apple juice
Milk – about 4 cups
Preparation:
Finely chop the apples and pour milk over them in a bowl. Boil until you get a thick paste, let it cool then massage it onto your breast tissue.
Leave this mask on for 15 minutes then wash it off with warm water then rinse with cold water to help tighten the skin.
The Citrus Tonic – Breast Mask Recipe
This mask correctly improves the blood flow in flaccid skin, makes it look healthy and firm.
Ingredients:
1 orange
1 grapefruit
1 lemon
Preparation:
Grind all the fruit to a pulp in a blender. Apply the paste to your breast skin. You may also squeeze some citrus juice out to dip cosmetics pads in.
Sesame Oil Breast Firming Masks
Sesame oil helps firm sagging breasts. Mix a glass of sesame oil with three spoon fulls of corn flakes.
Apply the produced mask on the skin, and after 15 minutes wash it off with lukewarm water.

Naija Food Recipe: Groundnut Soup

Recently, a friend was telling me how back in his school days in University of Nigeria, Nsukka (decades ago) he and his roomies would substitute groundnut for egusi in their soup. It was quite intriguing to hear a guy passionately share his cooking experience. Before then, I have heard people mention groundnut soup but combining groundnuts, tomatoes and leaves were considered (by me) as being quite absurd. Thus, I have never given a try out a thought.
However, after hearing it from my friend, I finally cooked it. Trust me; it sure made sense! The taste was everything I have been told and more – an incredible combination of savoury and sweet; very pleasant indeed and highly nutritious too. Served with fufu in Ghana and over rice as a national dish in Gambia, groundnut soup/stew is, of course, not native to only Southern and Northern Nigeria. Known also as peanut soup, it is quite popular in Taiwan (East Asia) and as a traditional Thanksgiving meal in Virgina (Unites States).
Though usually cooked plain or with pureed carrots in those parts of the world, the addition of leafy greens (ugwu, scent leaf, spinach or bitter leaf) and several other condiments – trust Naija with traditional spices – boosts this soup’s nutritional punch and makes it a lot tastier. You really should try this delish if you are yet to.
Groundnut Soup Recipe

Ingredients:

2 cups roasted groundnut (dry milled into paste)
Any meat of choice (assorted/goat/beef/chicken)
handful any leafy green of choice (chopped and washed)
medium red onion (chopped)
6-10 Scotch bonnet (ata rodo)
fresh tomatoes
shrimps (dry or fresh)
Dry smoked fish (optional)
Stockfish
2 Tbs ground crayfish
1 Cooking spoon Palm oil
Stock water
Seasoning cubes
Salt to taste 

 
Preparation:
Season meat appropriately and bring to boil till well cooked. When almost soft, wash stockfish and shrimp add to the pot of boiling meat. Alternatively, stockfish can be soaked in hot water and salt, but that might take longer to soften.
While meat is cooking, blend tomatoes, onions and pepper. Set aside.
Scoop cooked meat out of the pot into a bowl, reduce heat to medium and pour in blended pepper and ground crayfish. Leave to boil for about 10 minutes then add the groundnut paste. Ensure to stir well so as to dissolve and eliminate likely lumps. You may need to add some water then leave to cook for 10 -12 minutes. Stir at intervals, taste for salt and adjust accordingly.
As the groundnut mix cooks, a thin film of oil may show on the surface. At this point, pour back your meat, stock fish, smoked fish and shrimps. Add palm oil, cook for another 5 minutes. Then finally add green vegetables and leave to simmer for just about 3 minutes.
Serve hot with any choice of swallow or rice.

Tips For Planning Your Child’s Birthday

I have had the chance to plan a few birthday parties, and in a matter of weeks, I will be planning my child’s first birthday party (I cannot believe it’s a year already!). While I was thinking of ideas, I realized it isn’t as easy as it seems planning a birthday especially if you are trying to work with a small budget. So I have compiled a few tips to help you plan an awesome birthday party.
1. Set a budget and stick to it
This is imperative and is the first thing to do. You need to decide how much you are willing to spend and ensure you stick to this amount. I advise planning a small first birthday party since your child will not even remember the party but be sure to take lots of pictures he can see when he is older
2. Have a guest list
Ok, it might be a bit difficult for some people to stick to a guest list, but remember, the party is not really about you but your child. So focus instead on your child’s friends from school or crèche; if your child is young (say the first birthday), and doesn’t have friends then invite only close friends and families and a few neighbours with their kids.
3. Decide on your venue
You would have to decide where to hold your party; it could be at a restaurant, at a recreational garden or even at home. Apart from the fact that your child will feel safer in the comfort of your house, it will also save you much money
4. Decide on your theme
What cartoon character or toy does your child like? This will help you in determining the right theme as there are lots of options to choose from. The theme will determine the party décor and possibly the cake design
5. Timing is critical
You have to pick the perfect time for the party; it is probably best to start the party right after your baby’s nap because a sleepy baby is a fussy baby. Try not to exceed an hour or two for the party, if possible. If the birthday falls on a weekday, consider having it the weekend before or the weekend after.
6. Games
Get an MC or friend who is an expert in kiddies games and parties; you will need to plan lots of activities for the children since they can be easily bored
7. Food
What is a party without food? I, for one, will hate a party without jollof rice. That aside, you could arrange for finger foods, candy, cake, biscuit and drinks without neglecting the jollof rice, of course.
8. Hire a photographer
Did you think your smartphone will suffice? No way. You need to get a professional photographer to take pictures and make sure every moment is captured.
9. Party bags and souvenirs

 
It is customary to give gifts to your guests at the end of the day. Order for party bags and fill them with toys, biscuits, colouring books, pens, candy, etc. It is also nice to give a little gift to the adults as well, so they do not feel left out


Tips To Avoid Body Odour

Body odour could be embarrassing and is most times as a result of improper hygiene. Here are a few tips to help you avoid body odour.

Tips To Avoid Body Odour
1. Drink lots of water
Drinking plenty of water will help wash out toxins in the body. The average adult woman needs 2.2 litres of water per day, so drink more water.
2. Eat a healthy diet
The foods you eat can affect how you smell. Foods that tend to make you sweat such as spicy foods may cause body odour. Also, garlic and onions you eat can be carried in sweats causing body odour. If you are experiencing body odour, try to steer clear of this foods as they can make your body odour worse. You should eat leafy vegetables, whole grains and healthy oils (e.g. olive oil).
3. Wash your clothes often
Endeavour to wash your clothes every time you sweat on them, it will keep your clothes and yourself smelling fresh. Also, wear breathable fabrics such as cotton.
4. Shave your regularly and keep it clean and dry
Getting rid of hair in your armpit can help reduce body odour because hair accumulates dirt from sweat which leads to body odour. After shaving ensure you wash your underarm regularly with water and soap and then keep it dry.
5. Keep yourself clean
Taking showers regularly can help rid you off body odour. Ensure you dry your body properly after taking a shower as bacteria like a moist environment. Consider applying powder to your armpit region to combat moisture.
6. Use an antiperspirant
Antiperspirants form a block against sweats and perspiration helping to eliminate body odour. You need to get one of these or at least use a deodorant.
7. Eliminate stress
Stress may cause body odour because it stimulates the apocrine glands which are glands that cause body odour. Try to eliminate stress from your life.


Tips To Raising Responsible Children

We all want responsible children, but responsible children are not born that way. They are responsible because someone (most likely the parents) instilled a sense of responsibility in them. So, as parents, we can also raise our children to be responsible. Here are some tips to doing that.

1. Start young
Ever heard of the phrase ‘Catch them young’, well it is at play when it comes to teaching responsibility to your kids. You cannot start teaching them responsibility in their teens and expect it to work out. The best time to start teaching it is when they become toddlers since they can communicate and understand you better at this stage. You can start by asking your child to pack up his toys into the toy box after playing with them or asking him to take his plates to the kitchen.
2. Be a Model of Responsibility
Guess what! Your children watch your every behavior and emulate it. So if they see you being responsible, they will do the same. For instance, if you teach them not to leave things lying around; you need to ensure you also put things in their proper place, this way they learn from your tidy behavior.
3. Allow your children to help you
When you are doing house chores, ask your children to help you with little things. It could be as simple as helping you throw dirt in the bin or helping you put things in their proper places.
4. when you are at fault
When we own up to our mistakes, we make our children understand that everybody makes mistakes and we need to accept responsibility for those mistakes.
5. Praise them
When your child does something good you have taught them e.g. taking their plates to the kitchen, praise them for a job well done. A simple ‘Thank you,’ ‘Great job’ or ‘I’m proud of you’ works wonders.
6. Don’t criticize when they make mistakes
Your children will no doubt make mistakes. If and when they do, avoid criticizing or yelling at them, instead appreciate them for making an effort and show them the proper way its done.