How to get bigger breasts

Bigger boobs, anyone? Most women want bigger boobs. Unfortunately, surgical procedures are expensive and could be risky. But there is some good news; here are safe and effective ways to increase your breast size naturally.

1. ExerciseRegular Exercises (Exercises for Firm Breasts) can improve the size of your breasts. Some exercises to try include; Push-ups, lifting dumbbells, wall press, Crunches.
2. Change your dietCertain foods can help increase your breast size. Foods rich in oestrogens such as dairy products, apples, cherries, carrots, cucumbers, rice and wheat are known to enhance the breast size.
3.Improve your PostureAn incorrect posture may make your boobs look smaller whereas proper posture can improve the size and appearance of your boobs.
4.Wear a proper-fitting braThis is a no brainer. Wearing a proper fitting bra (How to find a perfect bra) will not make your breasts bigger permanently, but they will make your breasts look rounder and firmer. There are some tips to follow in (choosing the right bra size) for your boobs, and you may even decide you are ok with the size of your breast with a properly sized bra.
5.Breast MassageBreast massages help tone, shape and develop the breast tissues. Perform breast massages properly and regularly, and you will notice an improvement in your breast size in a few weeks.
6.Use the art of MakeupWhile you are working on getting your breasts bigger, you could use makeup to create the illusion of bigger breasts. Here’s how:
(a)Apply a dark coloured bronzer or powder in your cleavage area, moving in between the breasts similar to a V shape and blend(b)Apply a light coloured powder over the top half of your breasts, blend to create natural and full looking boobs

Foods to Eat For More Youthful Skin

Every woman loves to get compliments like “you look younger than your age” “you have beautiful skin”. That’s why you see women doing everything possible to have flawless skin and a trim figure.
Eating the right foods can do more than just lead to weight loss. It can turn back the hands of time, as well.
If seeking eternal youthful looks is on your to-do list, try adding these recommended foods to your daily diet plan.
Anti-Ageing Foods for Youthful Skin

These foods have been proven to contain anti ageing agents that give youthful looks- good skin, healthy body, good hair.
Incorporating them into your diet means eating your way to youthfulness.
Tomatoes
Lycopene present in tomatoes may help prevent sun damage.
The potent antioxidant works best when cooked, so eating the homemade marinara sauce and tomato soup is a great option.
Eat at least one portion (about ¼ cup of sauce or 4 tomato slices) 5 times per week.
Dark chocolate
Cocoa flavonols improve circulation and blood flow to the scalp, delivering nutrients that may help keep it and your hair healthy.
The bioactive compounds that are present in dark chocolate may also be great for your skin.
The flavonols help protect against sun-induced damage, improve blood flow to the skin and increase skin density and hydration.
Sweet potatoes
Beta-carotene in sweet potatoes destroys free radicals, preventing damage to skin cells. The body converts beta-carotene into vitamin A, which fights signs of ageing.
Eat at least one per day. Swap in carrots, cantaloupe, or mangoes for a comparable effect.
Extra Virgin Olive Oil
Extra virgin olive oil is one of the healthiest fats on earth.
Research has shown that it may help prevent many common diseases associated with ageing.
Extra virgin olive oil lowers blood pressure, reduces the risk of heart disease, helps prevent metabolic syndrome and may be effective in fighting cancer.
Olive oil may also help your skin look youthful.
Nearly 73% of olive oil consists of monounsaturated fat, which we may associate with increased skin elasticity and firmness.
Green Tea
Green tea contains antioxidants, which can protect against free radicals.
Free radicals are unstable molecules that form during metabolism and in response to stress.
Antioxidants change their structure, so they’re unable to cause damage.
Polyphenols in green tea help protect collagen, the main protein in your skin, which may reduce and even partly reverse some signs of ageing.
Flaxseeds
Flaxseeds have amazing health benefits.
They are a great source of an omega-3 fatty acid called ALA, which protects your skin from sun radiation and may reduce sun-related skin damage.
In controlled studies, women who consumed flaxseeds or flax oil for 12 weeks showed improved hydration and smoother skin.

How to handle a bad breakup

We have probably been through a bad breakup at least once and some maybe twice or more. I know I wish I knew some of these things when I needed them, so I am here to help out with a few tips to getting your life back after a bad breakup.
1.Talk about it
Don’t bottle all your emotions, talk to a friend or family about your feelings and emotions.
2.Surround yourself with friends and family
You need to surround yourself with compassionate, supportive friends and family who will help you get over the breakup. This way you will find it easier to get on your feet again.
3.Take care of yourself
Make sure you see to your basic physical, spiritual and mental needs. Eat well, sleep well, exercise regularly and take time out to relax.
4.Do the things you love
It is okay to take time out to be on your own after a bad breakup but try to get back into the world as soon as you can. Make plans to go out with your friends and have fun!  Or you could just take yourself out; doing this will help you move on with your life.
5.Rediscover and Reinvent yourself
Now that you are single, this is the perfect time to discover yourself (if you have not already done this) and also work on becoming a better version of you.

6.Be Positive
No matter what, be positive. There is a reason for everything.
A better relationship is just around the corner.

Pilate for Postpartum Mothers

The postpartum period is an emotional time in a woman’s life.
With the joy of a new baby and personal physical and hormonal changes, it can be very challenging for mothers to have enough time during the day to take care of themselves while caring for their new baby.
However, new moms should know that it is important to devote some precious moments to their health and well-being and reconnect with their own mind and body.
Pilates offers a safe, effective and progressive means of reforming your body’s strength in just a matter of minutes.
Pilate’s help gain stability and flexibility. Core stabilization involves training the deepest muscles of the abdomen, spine and pelvis to support the trunk during movement and make your body more resilient to injury.
Pregnancy and delivery weakens each of these muscles and makes new mothers vulnerable to low back and pelvic pain and pathology.
Thus, reactivating these muscles and reconnecting the abdominal walls with the pelvic floor is important in the early stages of motherhood.
Pilates help promote flexibility by encouraging the spine to move in all planes of motion and all muscles to lengthen and stretch with proper biomechanics within safe and appropriate range of motion.

3 Core-Strengthening Pilates for Postpartum Mothers
Here are three core-strengthening postpartum Pilates exercises for new mothers.
Note that while they are safe and gentle, these exercises are intended for women who are at least six to eight weeks postpartum.
Make sure you check with your doctor or physical therapist if you are unsure whether these exercises are right for you.
Pelvic Floor
The pelvic floor is a multi-layered basket of muscles that holds your organs in your pelvic basin.
It is located in the area between your pubic bone, tailbone, and sitz bones. The pelvic floor is the foundation of your core and is too often neglected.
To begin the pelvic floor Pilate, draw your attention to your pelvic floor, lengthen your spine and keep it lengthened during the course of this exercise.
Engage your pelvic floor as if you were squeezing to stop the flow of urine mid-stream, then maintain the engagement while you lift your pelvic floor up vertically.
Transverse Abdominals
The transverse abs are the deepest layer of abdominal muscles.
Start by standing on all fours. Take one hand and place it on the center of your abdomen. Inhale, pushing your belly out like a balloon, then exhale, slowly pulling your belly in deeper and deeper, as if there were a string drawing your navel in toward your spine.
If you’re having difficulty connecting to your transverse abdominals while doing this exercise on your hands and knees then try it seated or supine.
Toe Taps
The toe tap is another great exercise that will strengthen your transverse abs and obliques.
Start by lying supine with your arms relaxed and knees bent at a 90-degree angle, lift one leg at a time into a chair position.
Now, you should look like you’re sitting in a chair, only with your back on the floor. Place your hands on your hips and engage your transverse abs.
Slowly lower your left leg, tap your foot lightly on the floor, and bring your leg back up to your starting chair pose. Repeat this with your right leg, and continue alternating legs for as many reps as possible.
Focus on isolating your pelvis as you articulate from the hip joint.
Keep your transverse abs engaged throughout to prevent your hips from rocking from side to side.
Also, do not arch your back as you do this exercise.
 
Here is hoping these help!

Benefits of Olive Oil

Olive oil is the healthiest fat on earth. It is packed with anti-aging antioxidants; making it superb for the hair, skin, and nails as well as for general well-being. Here are a few benefits of Olive oil:

Health Benefits
1.Olive oil has been found to be effective against Cancer
2.It controls Cholesterol
3.Olive oil treats Depression
4.An Olive oil diet reduces the risk of Diabetes
5.High consumption of Olive oil improves bone mineralisation and aids in preventing the onset of osteoporosis
6.People with diets containing high  levels of Olive oil are less likely to develop rheumatoid arthritis
7.Consumption of olive oil can help decrease both systolic and diastolic blood pressure
8.Olive oil lowers the risk of stroke
Skin and Beauty benefits
1.It prevents signs of ageing such as the appearance of wrinkles and fine lines
2.Olive oil helps remove makeup
3.It nourishes, rejuvenates and protects the skin
4.Olive oil helps prolong youth
5.It helps the skin maintain its elasticity and softness
6.Olive oil helps skin cells to regenerate
7.It moisturises the skin and improves skin health
8.Olive oil cures cracked heels
9.Olive oil improves nail health
Hair Benefits
1.It keeps hair healthy while giving it a luxurious shine
2.Olive oil moisturises the hair and reduces scalp irritation

Ombre Lips

After you have mastered all the basic make up moves you need, you can step it up a notch by going for Ombre lips. I am sure you are wondering; ‘which one is that again?’ I can assure you that you have seen it before.
 The funny part is, our ancestors thought of this move before- but in a crude way. You remember the black lip liner thing? Yes, that is what I am talking about! Well, that move has been modified and is now safe for you to try.
First thing you should do is apply concealer on your lips to create a base for the wonderful colours that come next.
You can use any colours of your choice to create the Ombre lip as long as you have a lighter shade and a darker shade. Red is the most popular shade for Ombre but you can go with pink, purple etc.
Line your lips with the dark coloured lip liner as you would normally do. Add more of this dark lip liner to the corner of your lips bringing the colour in towards the middle, but do not colour all of your lips with this shade. It can be tempting to overdo it but just remember old Nollywood and I am sure that should stop you at the right time.

Apply the lighter colour to the middle of your lips and the areas without the darker shade. Press your lips together once or twice but do not rub the colours together. Try not to actually squeeze your lips together. Simply press your lips together and pull apart in one smooth motion.
At this stage you can use your lip brush or cotton bud to blend the edges of your colours together to create a fading effect.
This look is really fabulous, but it’s hard to keep up and certainly not for everyday wear.


Glycolic Peel Facial

I have always had very oily skin and occasional breakouts. It was never a problem for me until my skin revolted totally. I had more breakouts, rashes, dry skin and some patches. It was horrible.
 I decided to do something about it. Immediately I made up my mind; I booked an appointment with a dermatologist. I went in for my first consult for an assessment. I discovered I needed to change my regimen and bought some products for sensitive skin. I was then booked in for three sessions of Glycolic peel facials. I highly recommend it. I will tell you more.

Glycolic skin peel at my dermatologist, although I could not get a good look at the products used, was very effective. In a glycolic facial, acid is applied on the face to penetrate, cleanse and restore the face. Of course, this is not the malicious acid you prepare for your enemy. Glycolic acid can be created from sugar canes and also be created synthetically in labs. The acid is applied on the face directly or diluted first. With glycolic skin peels, the dead skin gets exfoliated, and you receive a deep cleanse. You remove dirt that ordinary soap cannot reach. A glycolic peel is good for you if you have;

Hyperpigmentation
Acne
Dry skin
Sun damaged skin
Ageing skin
Blemishes

What to Expect
I got to lie in a hospital bed and snooze for a few minutes. Even if it is called a Glycolic peel or sometimes a Glycolic Acid Peel, the actual process is simpler than it sounds. The skin is cleansed, and the acid applied liberally then cleansed again.
Complications?
Some of the possible risks after are not limited to, but include; swelling, itching, redness, scabbing, cold sores, prolonged skin sensitivity to the wind and the sun, increased or decreased pigmentation. Personally, I did not encounter any of these problems, but you should be well aware of the risks.
After Care

You should wear sunscreen after
Do not use products outside what your practitioner recommends
Do not undergo any bleaching, peeling, waxing while undergoing treatment

 
To achieve maximum results, you may need a course of between 2-4 chemical peel treatments depending on your skin type, tone and condition.
 

A Guide to Bikini Waxing

These days the standards of beauty have risen so high that there is this huge gap between what you see in magazines and on social media versus what you see in an average everyday woman especially an African one. I am in no way condemning people that live life the way they do. However, there are some of us who are very curious about how these glamorous women achieve some of their results.
One of the things that was very fascinating to me was how some women could be so hairless when scantily clad. I mean there was an appeal for me to see how smooth ones skin could really get even in the nether regions.
I started exploring the idea of a bikini wax. Yes, it is painful, if that was your first question.
If you’re considering it, here are some things you should know; 

Stop worrying; just relax. The people who do this have seen it all. There is nothing weird about yours. It may help to carry out proper hygiene before heading to the tables so you are more comfortable
There is such a thing as a bikini wax; this just tidies the hair at the sides, top and bottom so it doesn’t extend beyond your panties. Brazilian wax is more thorough leaving just a line in the centre. Hollywood wax; everything goes
You usually have to take off only the clothes at the lower end of your body. You may be given those disposable panties for the session
The therapist would apply melted hot wax onto a small section of your hair using a spatula. Then a strip of cloth or muslin is applied on top of the wax, she presses down for a few seconds, holds the skin taut and pulls the strip away in one sharp tug. She continues repeating this process, both sides, until you’re all done. You may have a male therapist but always voice your concerns if you are in any way uncomfortable.
The therapist finishes by checking her handiwork and removes any remaining stray hairs with tweezers. This is very important
Finally, a soothing cream is applied all over
There may be some pain especially if it is your first time. Who am I kidding, I advise that you take a dose of Ibuprofen before hand
It may swell and be tender for a couple of hours

After the pain subsides, you will be fine and hair free. I promise.

3 Cute Ways to Style Your Box Braids

Whether you call them box braids, jumbo braids, or even Poetic Justice braids, this trendy hairstyle is one you should rock. Not only are box braids a fun hairstyle that gives a fun look, but they’re also a great style for girls trying to protect their hair during the cold winter months.
Women like box braids because they offer an excellent opportunity to extend the hair and wear versatile hairstyles which look exquisite yet are very simple to do. 
The only downside to box braids is weak, brittle hair. But if you have none of such complaints, don’t ever hesitate to rock this look: Box braids can be styled in some awesome ways.

Box braids can last for months when properly taken care of, which makes them ideal for any time of year and any occasion.Whether you’re currently rocking box braids or considering booking a salon appointment to get it done, scroll through the photos below for hairstyle inspiration.


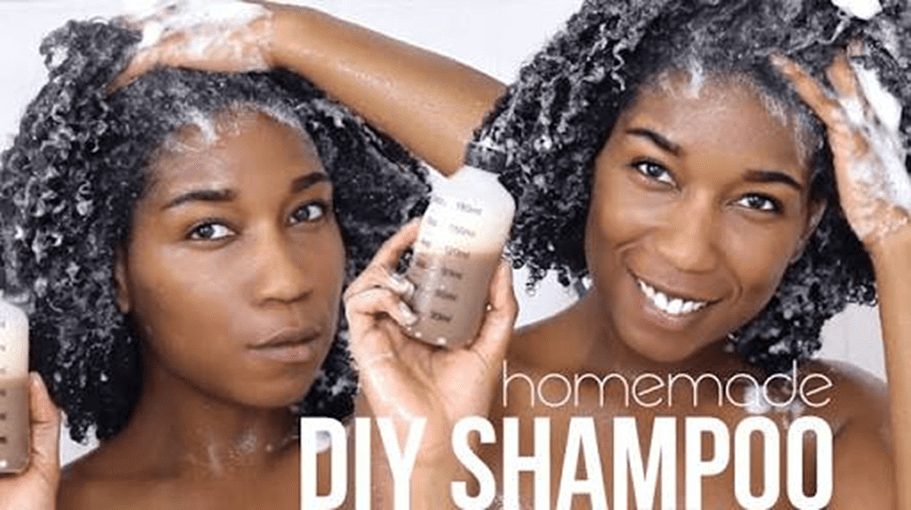
Homemade Shampoo for Dry Natural Hair

Finding a good shampoo can be stressful, especially if you want to mix your own and you have dry natural hair. While some store-bought shampoos can be stripping and harsh, many homemade shampoos do not seem to clean the hair properly.
The following homemade shampoo recipes may provide that cleansing power without leaving your strands very dry:

Homemade Shampoo Recipes:
African Black Soap Shampoo
African black soap is made with palm leaves, cocoa pod ash, plantain skin ash, palm kernel oil, and sometimes fewer or more ingredients (e.g. shea butter).
Mix this soap with glycerin or honey (both of which are humectants), grapeseed oil (helps to lock in moisture), and clean water so you have a cleansing, non-stripping shampoo.
Ingredients:
4 tbsp African black soap (crumbled into pieces)
1 cup hot distilled water
Two tsp glycerin (or pure honey)
Three tsp grapeseed oil
Instructions:
Mix the ingredients together in a bottle. Shake the bottle well and allow the mixture to cool before using.
Save the remainder in a corked bottle for future use (up to a few weeks).
Coconut Milk Shampoo
Liquid castile soap is made from olive oil (and/or other oils) and water.
Although some naturals have been ripped off from it with all the talk of pH, the reality is that other naturals have faired fine using it in their shampoo recipes.
If you want to give liquid castile soap a try, the following mixture involves the addition of organic coconut milk (for dilution and additional lathering), distilled water (for further dilution), and safflower oil (for moisture).
Ingredients:
1/4 cup liquid castile soap
3 tbsp organic coconut milk
One tsp distilled water
One tsp safflower oil (add more if you desire)
Instructions:
Mix your ingredients together in a bottle. Shake the bottle well before use.
Save the remainder in a closed bottle for future use (can last up to a few weeks).
Follow up with an apple cider vinegar rinse (if necessary) for pH balance.