Benefits of Olive Oil

Olive oil is the healthiest fat on earth. It is packed with anti-aging antioxidants; making it superb for the hair, skin, and nails as well as for general well-being. Here are a few benefits of Olive oil:

Health Benefits
1.Olive oil has been found to be effective against Cancer
2.It controls Cholesterol
3.Olive oil treats Depression
4.An Olive oil diet reduces the risk of Diabetes
5.High consumption of Olive oil improves bone mineralisation and aids in preventing the onset of osteoporosis
6.People with diets containing high  levels of Olive oil are less likely to develop rheumatoid arthritis
7.Consumption of olive oil can help decrease both systolic and diastolic blood pressure
8.Olive oil lowers the risk of stroke
Skin and Beauty benefits
1.It prevents signs of ageing such as the appearance of wrinkles and fine lines
2.Olive oil helps remove makeup
3.It nourishes, rejuvenates and protects the skin
4.Olive oil helps prolong youth
5.It helps the skin maintain its elasticity and softness
6.Olive oil helps skin cells to regenerate
7.It moisturises the skin and improves skin health
8.Olive oil cures cracked heels
9.Olive oil improves nail health
Hair Benefits
1.It keeps hair healthy while giving it a luxurious shine
2.Olive oil moisturises the hair and reduces scalp irritation
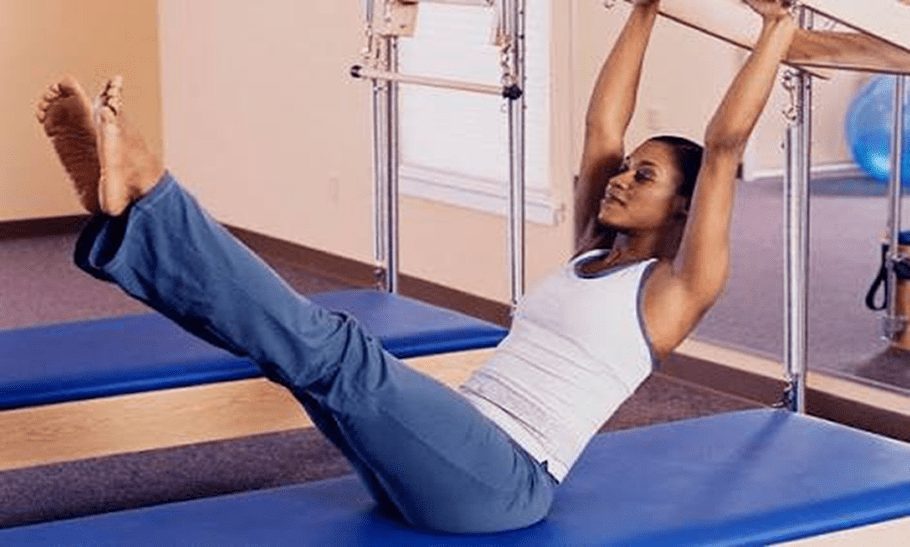
Pilate for Postpartum Mothers

The postpartum period is an emotional time in a woman’s life.
With the joy of a new baby and personal physical and hormonal changes, it can be very challenging for mothers to have enough time during the day to take care of themselves while caring for their new baby.
However, new moms should know that it is important to devote some precious moments to their health and well-being and reconnect with their own mind and body.
Pilates offers a safe, effective and progressive means of reforming your body’s strength in just a matter of minutes.
Pilate’s help gain stability and flexibility. Core stabilization involves training the deepest muscles of the abdomen, spine and pelvis to support the trunk during movement and make your body more resilient to injury.
Pregnancy and delivery weakens each of these muscles and makes new mothers vulnerable to low back and pelvic pain and pathology.
Thus, reactivating these muscles and reconnecting the abdominal walls with the pelvic floor is important in the early stages of motherhood.
Pilates help promote flexibility by encouraging the spine to move in all planes of motion and all muscles to lengthen and stretch with proper biomechanics within safe and appropriate range of motion.

3 Core-Strengthening Pilates for Postpartum Mothers
Here are three core-strengthening postpartum Pilates exercises for new mothers.
Note that while they are safe and gentle, these exercises are intended for women who are at least six to eight weeks postpartum.
Make sure you check with your doctor or physical therapist if you are unsure whether these exercises are right for you.
Pelvic Floor
The pelvic floor is a multi-layered basket of muscles that holds your organs in your pelvic basin.
It is located in the area between your pubic bone, tailbone, and sitz bones. The pelvic floor is the foundation of your core and is too often neglected.
To begin the pelvic floor Pilate, draw your attention to your pelvic floor, lengthen your spine and keep it lengthened during the course of this exercise.
Engage your pelvic floor as if you were squeezing to stop the flow of urine mid-stream, then maintain the engagement while you lift your pelvic floor up vertically.
Transverse Abdominals
The transverse abs are the deepest layer of abdominal muscles.
Start by standing on all fours. Take one hand and place it on the center of your abdomen. Inhale, pushing your belly out like a balloon, then exhale, slowly pulling your belly in deeper and deeper, as if there were a string drawing your navel in toward your spine.
If you’re having difficulty connecting to your transverse abdominals while doing this exercise on your hands and knees then try it seated or supine.
Toe Taps
The toe tap is another great exercise that will strengthen your transverse abs and obliques.
Start by lying supine with your arms relaxed and knees bent at a 90-degree angle, lift one leg at a time into a chair position.
Now, you should look like you’re sitting in a chair, only with your back on the floor. Place your hands on your hips and engage your transverse abs.
Slowly lower your left leg, tap your foot lightly on the floor, and bring your leg back up to your starting chair pose. Repeat this with your right leg, and continue alternating legs for as many reps as possible.
Focus on isolating your pelvis as you articulate from the hip joint.
Keep your transverse abs engaged throughout to prevent your hips from rocking from side to side.
Also, do not arch your back as you do this exercise.
 
Here is hoping these help!

Ombre Lips

After you have mastered all the basic make up moves you need, you can step it up a notch by going for Ombre lips. I am sure you are wondering; ‘which one is that again?’ I can assure you that you have seen it before.
 The funny part is, our ancestors thought of this move before- but in a crude way. You remember the black lip liner thing? Yes, that is what I am talking about! Well, that move has been modified and is now safe for you to try.
First thing you should do is apply concealer on your lips to create a base for the wonderful colours that come next.
You can use any colours of your choice to create the Ombre lip as long as you have a lighter shade and a darker shade. Red is the most popular shade for Ombre but you can go with pink, purple etc.
Line your lips with the dark coloured lip liner as you would normally do. Add more of this dark lip liner to the corner of your lips bringing the colour in towards the middle, but do not colour all of your lips with this shade. It can be tempting to overdo it but just remember old Nollywood and I am sure that should stop you at the right time.

Apply the lighter colour to the middle of your lips and the areas without the darker shade. Press your lips together once or twice but do not rub the colours together. Try not to actually squeeze your lips together. Simply press your lips together and pull apart in one smooth motion.
At this stage you can use your lip brush or cotton bud to blend the edges of your colours together to create a fading effect.
This look is really fabulous, but it’s hard to keep up and certainly not for everyday wear.


A Guide to Bikini Waxing

These days the standards of beauty have risen so high that there is this huge gap between what you see in magazines and on social media versus what you see in an average everyday woman especially an African one. I am in no way condemning people that live life the way they do. However, there are some of us who are very curious about how these glamorous women achieve some of their results.
One of the things that was very fascinating to me was how some women could be so hairless when scantily clad. I mean there was an appeal for me to see how smooth ones skin could really get even in the nether regions.
I started exploring the idea of a bikini wax. Yes, it is painful, if that was your first question.
If you’re considering it, here are some things you should know; 

Stop worrying; just relax. The people who do this have seen it all. There is nothing weird about yours. It may help to carry out proper hygiene before heading to the tables so you are more comfortable
There is such a thing as a bikini wax; this just tidies the hair at the sides, top and bottom so it doesn’t extend beyond your panties. Brazilian wax is more thorough leaving just a line in the centre. Hollywood wax; everything goes
You usually have to take off only the clothes at the lower end of your body. You may be given those disposable panties for the session
The therapist would apply melted hot wax onto a small section of your hair using a spatula. Then a strip of cloth or muslin is applied on top of the wax, she presses down for a few seconds, holds the skin taut and pulls the strip away in one sharp tug. She continues repeating this process, both sides, until you’re all done. You may have a male therapist but always voice your concerns if you are in any way uncomfortable.
The therapist finishes by checking her handiwork and removes any remaining stray hairs with tweezers. This is very important
Finally, a soothing cream is applied all over
There may be some pain especially if it is your first time. Who am I kidding, I advise that you take a dose of Ibuprofen before hand
It may swell and be tender for a couple of hours

After the pain subsides, you will be fine and hair free. I promise.

Glycolic Peel Facial

I have always had very oily skin and occasional breakouts. It was never a problem for me until my skin revolted totally. I had more breakouts, rashes, dry skin and some patches. It was horrible.
 I decided to do something about it. Immediately I made up my mind; I booked an appointment with a dermatologist. I went in for my first consult for an assessment. I discovered I needed to change my regimen and bought some products for sensitive skin. I was then booked in for three sessions of Glycolic peel facials. I highly recommend it. I will tell you more.

Glycolic skin peel at my dermatologist, although I could not get a good look at the products used, was very effective. In a glycolic facial, acid is applied on the face to penetrate, cleanse and restore the face. Of course, this is not the malicious acid you prepare for your enemy. Glycolic acid can be created from sugar canes and also be created synthetically in labs. The acid is applied on the face directly or diluted first. With glycolic skin peels, the dead skin gets exfoliated, and you receive a deep cleanse. You remove dirt that ordinary soap cannot reach. A glycolic peel is good for you if you have;

Hyperpigmentation
Acne
Dry skin
Sun damaged skin
Ageing skin
Blemishes

What to Expect
I got to lie in a hospital bed and snooze for a few minutes. Even if it is called a Glycolic peel or sometimes a Glycolic Acid Peel, the actual process is simpler than it sounds. The skin is cleansed, and the acid applied liberally then cleansed again.
Complications?
Some of the possible risks after are not limited to, but include; swelling, itching, redness, scabbing, cold sores, prolonged skin sensitivity to the wind and the sun, increased or decreased pigmentation. Personally, I did not encounter any of these problems, but you should be well aware of the risks.
After Care

You should wear sunscreen after
Do not use products outside what your practitioner recommends
Do not undergo any bleaching, peeling, waxing while undergoing treatment

 
To achieve maximum results, you may need a course of between 2-4 chemical peel treatments depending on your skin type, tone and condition.
 

3 Cute Ways to Style Your Box Braids

Whether you call them box braids, jumbo braids, or even Poetic Justice braids, this trendy hairstyle is one you should rock. Not only are box braids a fun hairstyle that gives a fun look, but they’re also a great style for girls trying to protect their hair during the cold winter months.
Women like box braids because they offer an excellent opportunity to extend the hair and wear versatile hairstyles which look exquisite yet are very simple to do. 
The only downside to box braids is weak, brittle hair. But if you have none of such complaints, don’t ever hesitate to rock this look: Box braids can be styled in some awesome ways.

Box braids can last for months when properly taken care of, which makes them ideal for any time of year and any occasion.Whether you’re currently rocking box braids or considering booking a salon appointment to get it done, scroll through the photos below for hairstyle inspiration.


Micro Blading

Honestly ladies I can be your guinea pig for almost any beauty concern. So after I got my eye lash extensions which I loved, I started thinking about micro blading, which is a service that my salon also offers.
 I may have lost some people right now, so let me explain. Micro blading is a technique like waxing or threading for eyebrows only it is semi permanent, giving defined brows and tint for up to 18 months.

In case you haven’t heard of said procedure, manual micro blading is a form of semi-permanent tattoo that involves using tiny needles (instead of a tattoo gun) that make up a small blade to help deposit pigment under your skin
You may be wondering what would make anyone consider this sort of procedure but trust me when you have to decide between brow fillers, eye brow pencil, brow powder and the rest, a sort of permanent well done eyebrow is very desirable. I mean you get to wake up with your eyebrows on fleek every day. If you get this done and your eye lashes and skin look good, you practically do not need any make up. Think of how fast it would take to get ready in the mornings and for any occasion.

After I decided to get micro blading for my eyebrows, I made a few discoveries;
• It is not ideal for oily skin
If you have really oily skin, it may be better to get shading which is another semi permanent procedure. This is because most times a tint is used in the micro blading process and oil will blur the thin hair like strands and cause the tint to fade. It will not last as long. Hence a possible waste of resources
• It is not cheap
That being said; you can compare prices at different stylists but it will cost you a quite a bit to get it done properly.
• The process can take time
I am talking like two hours. If you have to rush somewhere I don’t suggest booking the appointment then.
• Pick a shape first
Really discuss with your stylist, you don’t want to come out with a brow shape you hate for months.
• It is really helpful if you have no hair or scant hair on your eyebrows
It really is a life saver.
• There are after care instructions
Your stylist will talk you through the Dos and Don’ts right after. So you may not get to skip off into the sunset immediately. You will need to be careful the first few days after to prevent an infection.
Did I mention it looks really natural?
I highly recommend it!

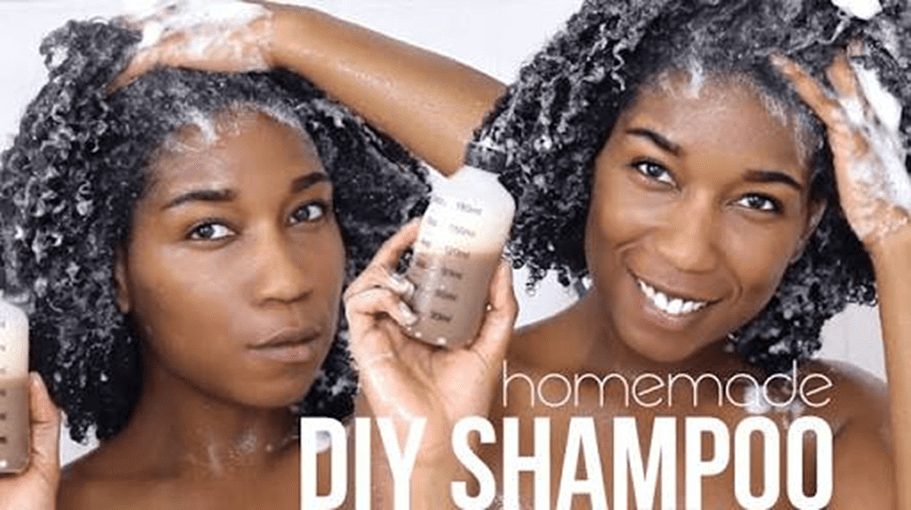
Homemade Shampoo for Dry Natural Hair

Finding a good shampoo can be stressful, especially if you want to mix your own and you have dry natural hair. While some store-bought shampoos can be stripping and harsh, many homemade shampoos do not seem to clean the hair properly.
The following homemade shampoo recipes may provide that cleansing power without leaving your strands very dry:

Homemade Shampoo Recipes:
African Black Soap Shampoo
African black soap is made with palm leaves, cocoa pod ash, plantain skin ash, palm kernel oil, and sometimes fewer or more ingredients (e.g. shea butter).
Mix this soap with glycerin or honey (both of which are humectants), grapeseed oil (helps to lock in moisture), and clean water so you have a cleansing, non-stripping shampoo.
Ingredients:
4 tbsp African black soap (crumbled into pieces)
1 cup hot distilled water
Two tsp glycerin (or pure honey)
Three tsp grapeseed oil
Instructions:
Mix the ingredients together in a bottle. Shake the bottle well and allow the mixture to cool before using.
Save the remainder in a corked bottle for future use (up to a few weeks).
Coconut Milk Shampoo
Liquid castile soap is made from olive oil (and/or other oils) and water.
Although some naturals have been ripped off from it with all the talk of pH, the reality is that other naturals have faired fine using it in their shampoo recipes.
If you want to give liquid castile soap a try, the following mixture involves the addition of organic coconut milk (for dilution and additional lathering), distilled water (for further dilution), and safflower oil (for moisture).
Ingredients:
1/4 cup liquid castile soap
3 tbsp organic coconut milk
One tsp distilled water
One tsp safflower oil (add more if you desire)
Instructions:
Mix your ingredients together in a bottle. Shake the bottle well before use.
Save the remainder in a closed bottle for future use (can last up to a few weeks).
Follow up with an apple cider vinegar rinse (if necessary) for pH balance.

Steps to improving your self esteem

Boost your self-esteem with these tips:

1.Talk and Think Positively
The way you think about yourself has a positive influence on your self-esteem. Start thinking positively, this will help build your confidence and eventually, your self esteem.
2.Stop Comparing
You need to stop comparing yourself to others. You are unique the way you are. Instead find your strengths and focus on them.
 
3.Exercise
Exercise has been known to boost the mood, so exercising could help you boost your self esteem
 
4.Don’t strive for Perfection
Nobody is perfect! I am not saying you shouldn’t try to be the best or try to do your best, just don’t stress over being overly perfect.
 
5.Surround yourself with supportive people
Don’t spend time with people who pull you down rather spend time with people who make you feel good about yourself.
 
6.Appreciate and Celebrate yourself
Appreciating yourself will reload you with a lot of positive energy and build your self-esteem in the long run.
 
7.Don’t beat yourself up over a mistake
Everyone makes mistakes so why stress over it? If you make a mistake, learn from it and move on.
 
8.Do things you enjoy
What do you enjoy doing? If you are doing things you enjoy, you are more likely to think positively.

Movie Review: Disney Moana

The child in mind is very much alive, can you tell? Well, today I watched Moana, and I enjoyed it tremendously. Moana is a great family movie; I love the direction Disney is going these days, skipping Prince Charming altogether.

This story is about Moana, the chief’s daughter who has been chosen by the sea to go on a voyage that would save her people from danger though the disaster is not imminent at the time. Moana has the dilemma that most of us go through to either tread a path that had been laid out for her by her father to be content to stay on the island and lead her people or to sail across the sea to find her way.  She learns the traditions of her people to become a great chief but continually receives inspiration from her grandmother the village crazy lady. Tragedy pushes her to take the plunge; she must sail to find Maui the Demigod and command him to sail with her and return that which he took.
Maui, on the other hand, has a lot of subliminal lessons for us to learn from, abandoned to the gods by his parents, he becomes a demigod and performs deed after deed to receive love and worship from the humans which are never enough. Thor has his hammer; Maui has his hook which he lost in battle. Moana, the human, helps Maui see that he is valuable with or without his hook or the love of humans.
It is beautiful to see that the main villain was once the source of all things beautiful, almost like Maleficient showing us that most villains are mostly understood or simply hurt. Moana sees this in the end as is able to make it right. She returns home a hero and leads her people to sea as their ancestors before them went on as voyagers.